Guide

Learn BromeoGrid from the first workspace to a full setup

This page walks through the workflow in order: create your first workspace, build the grid, assign apps to cells, expand into more workspaces, and lock the setup down when it is ready.

Start here

The fast path from empty setup to a repeatable workflow

If you are new, follow this order: create one workspace, shape the grid, tune it live, bind apps to cells, add more workspaces, and only then move into advanced settings, extensions, account tools, and diagnostics.

  1. 1 First workspace
  2. 2 Grid Editor
  3. 3 Divvy Matrix
  4. 4 Assign App To Cell
  5. 5 Workspace Switcher
  6. 6 Hard Lock
  7. 7 Advanced settings
  8. 8 Exclude apps
  9. 9 Feature flags
  10. 10 Hotkeys
  11. 11 Taskbar menu
  12. 12 AuraSync extension
  13. 13 License and account
  14. 14 Diagnostics

Use the first six steps to build the workflow itself. Use the later sections only once the workspace system already feels stable and worth polishing.

01

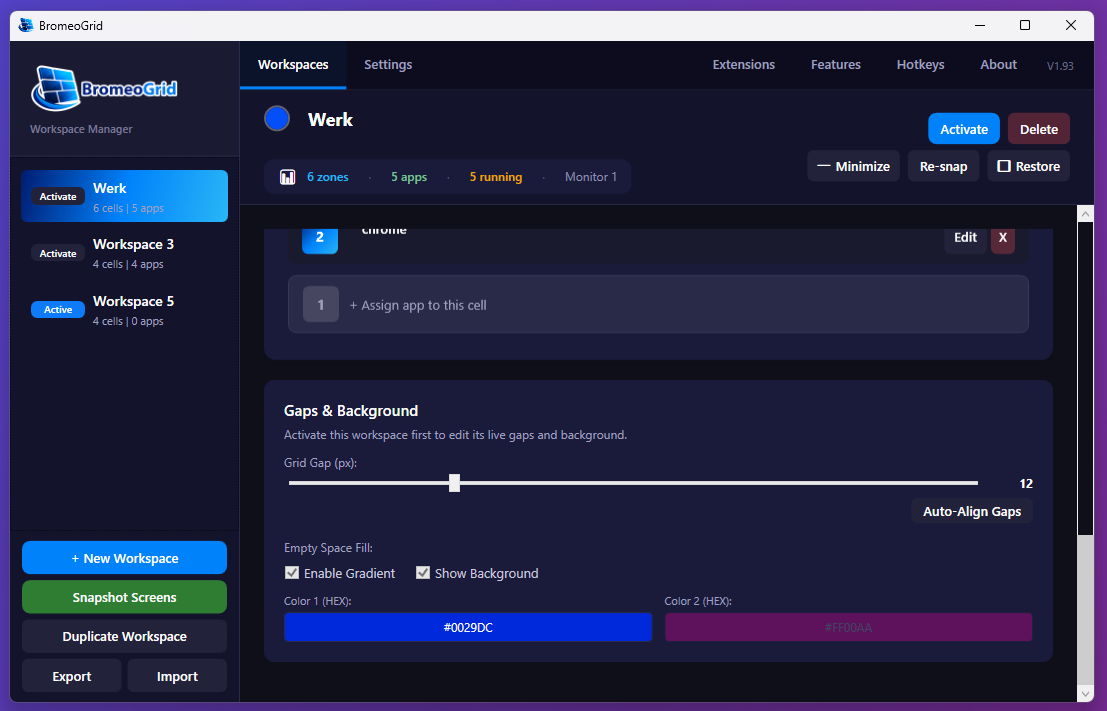
Create your first workspace

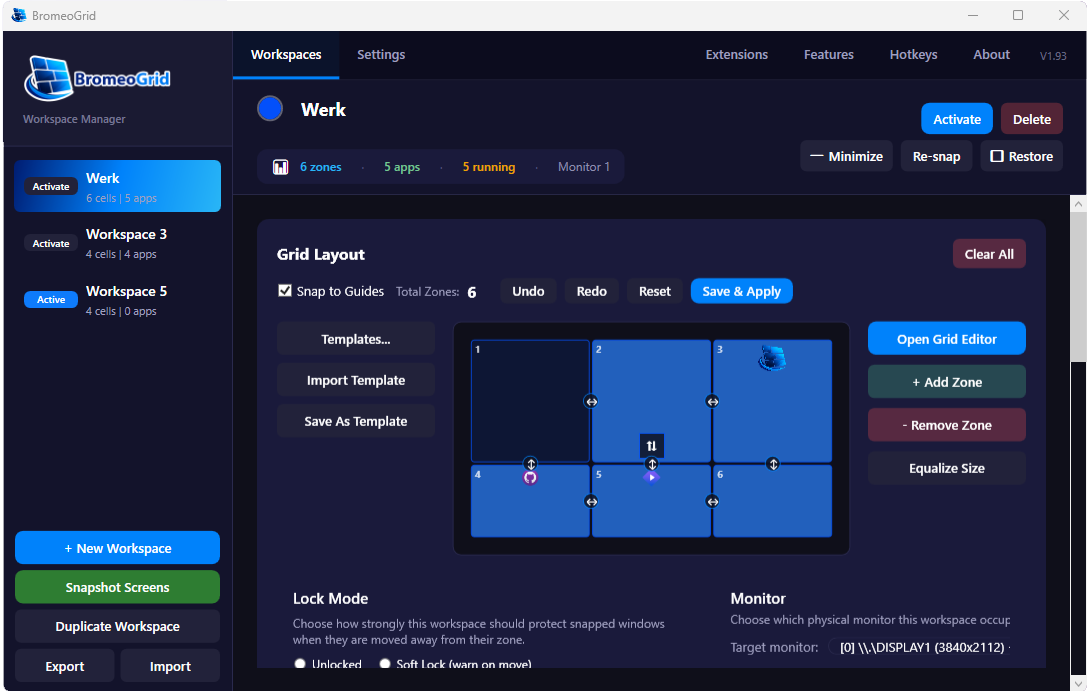
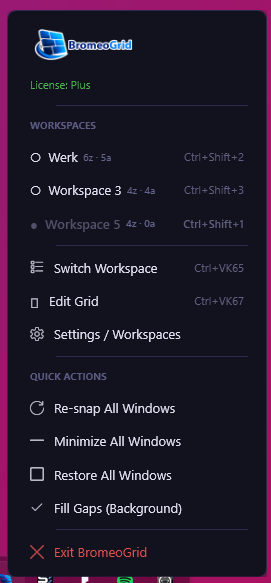
Start with one workspace that matches one real situation, for example Work or Streaming. Give it a clear name, set the main monitor target, and save before adding complexity.

  • Choose a workspace name you will recognize instantly.
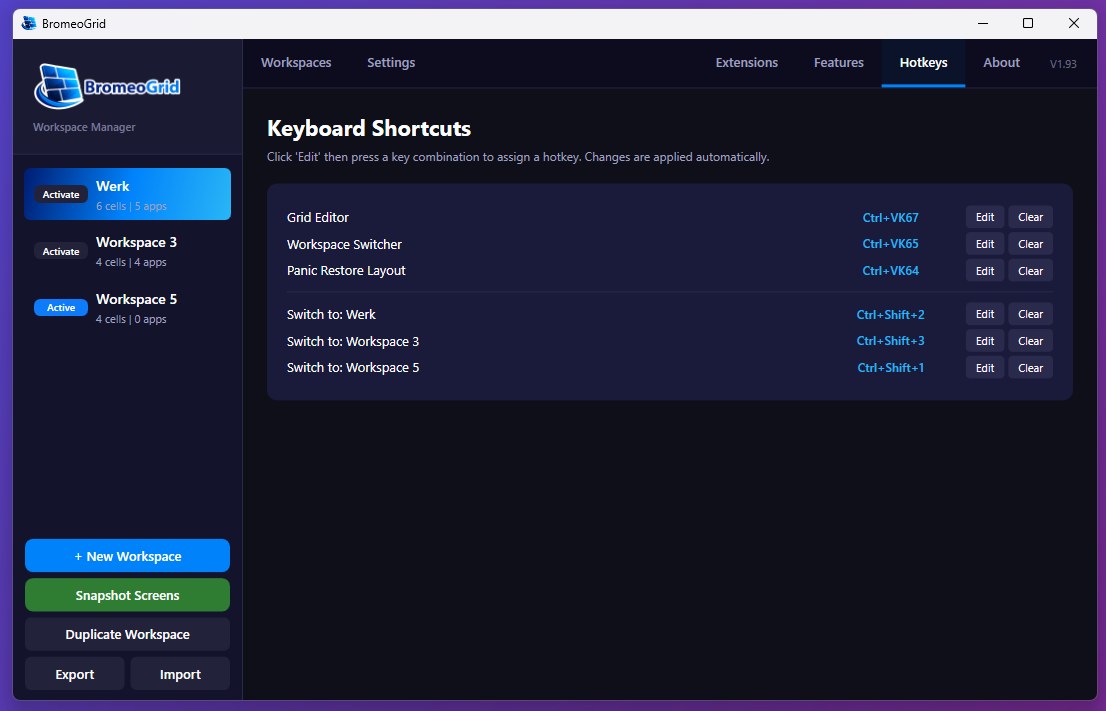
  • Set the intended monitor and workspace hotkey early.
  • Keep the first version simple enough to test quickly.
BromeoGrid first workspace settings
Start with the workspace settings panel and save one clean baseline.
02

Build and expand the grid

Use the Grid Editor to create the exact structure you need. Start with the largest zones first, then split and refine. A good grid should match how your apps actually behave, not just how the screen looks.

  • Add the main work areas first.
  • Use equalize and resize tools before going too granular.
  • Test with your real apps after each major change.
BromeoGrid grid editor
The grid is the foundation. Get this right before moving on.
03

Use the Divvy Matrix for fast live resizing

The Divvy Matrix is the fast adjustment layer on top of your grid. Open it with Shift + Right Click when you want to reshape zones quickly without dropping out of your current workspace flow.

  • Use it when the layout is close but not fully right yet.
  • The denser Pro densities let you work much more precisely on busy setups.
  • Treat it as the quick live tuning tool after the first grid is already in place.
Hover preview Open the matrix when you need more precise live control than a basic drag gives you.
04

Use Assign App To Cell

Assign App To Cell is one of the most important features. It lets you bind a real app to a specific zone so your setup becomes repeatable instead of manual every time.

  • Bind browsers, chat tools, editors and media apps to fixed cells.
  • Check the executable path and matching rule carefully.
  • Use this whenever the same app should always land in the same place.
BromeoGrid assign app to cell dialog
This is where the setup stops being visual only and becomes operational.
05

Add more workspaces and switch fast

Once one workspace feels stable, duplicate the idea for another context like Streaming, Editing, or Support. The Workspace Switcher then becomes the fast way to jump between complete setups.

This matters because the switcher does not only swap the visual layout. It swaps the workspace identity with its own zones, app assignments, overlays, hotkeys and monitor target. That is why it feels like switching operating modes instead of just switching windows.

  • Create one workspace per real task set.
  • Keep the names and hotkeys consistent.
  • Use the switcher only after each workspace is usable on its own.
  • Think of Work, Streaming and Editing as separate ready-made scenes you can recall instantly.
Hover preview The switcher is strongest when each workspace already has a clear purpose.
06

Enable Hard Lock when the layout is ready

Hard Lock matters when you want the desktop to stay disciplined. After your layout and app assignments are correct, Hard Lock helps prevent accidental changes and keeps the workspace stable.

  • Use Hard Lock after testing, not during rough setup.
  • Combine it with hotkeys for a reliable routine.
  • Turn it on for environments where placement must stay exact.
BromeoGrid hard lock settings
Hard Lock is a finishing step, not the first step.
07

Refine monitor targets, overlays and advanced behavior

When the core is working, go deeper: monitor targeting, zone marker overlays, gradients, spacing, workspace schedules, shortcuts and workspace-specific settings. These are the features that make the setup feel personal and efficient.

  • Use monitor target when a workspace belongs on one specific display.
  • Use overlays when you need visible labels inside the layout.
  • Tune gaps and background last, once the actual structure is already right.
  • Use schedules only for routines that should really happen automatically.
  • Keep advanced settings purposeful instead of turning everything on at once.
BromeoGrid overlay settings
Overlay visibility and marker controls are part of the finishing layer.
BromeoGrid gap and background settings
Spacing and background give the workspace its final polish.
BromeoGrid zone marker overlay and workspace schedules
Schedules and overlays belong in the same advanced refinement pass.

Advanced reference

The parts you usually add after the core workflow is stable

Once the basic workspace flow feels good, these are the controls that make the setup more personal, more automated, and easier to maintain over time.

BromeoGrid exclude apps settings

Exclude apps

Use this when a program should stay completely outside the workspace system. Good examples are tray tools, launchers, floating controls, or apps that should never be auto-snapped.

BromeoGrid feature flags

Feature flags

Feature flags let you trim the UI down to only what you want visible. This is useful when you want a simpler setup or when you only use a focused subset of BromeoGrid.

BromeoGrid hotkeys page

Hotkeys

This is where the workspace system becomes fast in daily use. Use hotkeys for switching workspaces, opening the grid tools, and restoring layouts without hunting through the UI.

BromeoGrid taskbar menu

Taskbar menu

The taskbar menu is the quick-access control point when the main window is closed. It is the right place for fast actions like opening the dashboard, refreshing overlays, or toggling background behavior.

BromeoGrid AuraSync extension

AuraSync extension

AuraSync is an optional extension layer for people who want their active workspace edges to react visually to audio. Treat it as a visual add-on after your layout and workspace structure already feel solid.

BromeoGrid license panel

License and account linking

The license area is where the desktop app connects to your website account and activates trials, paid plans, or purchased extensions. Once linked, the desktop app can refresh what your account is allowed to use.

BromeoGrid diagnostics panel

Troubleshooting and diagnostics

When snapping, browser sources, hotkeys, or entitlement refreshes behave strangely, diagnostics give you the fastest overview of what the app currently thinks is active and configured.

A simple expansion path that keeps working

A strong BromeoGrid setup usually grows in this order: one workspace, one clean grid, Divvy Matrix tuning, app-to-cell assignments, a second workspace, then Hard Lock and advanced settings. That order keeps the software understandable while still letting you scale into a much more powerful workflow.

BromeoGrid work workspace
BromeoGrid streaming workspace